
 Português
 Español
FCA is an acronym for “Fact-Cause-Action”. This feature is used to analyze the result of the indicator in the month when it is out of the green range, i.e., when it does not have a green headlight.
Creating a FCA
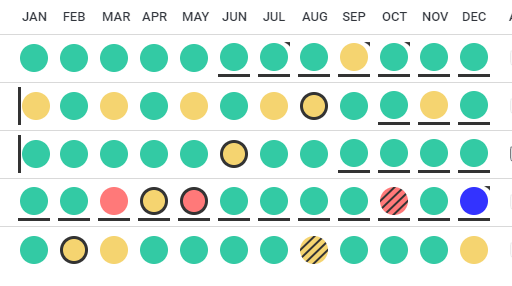
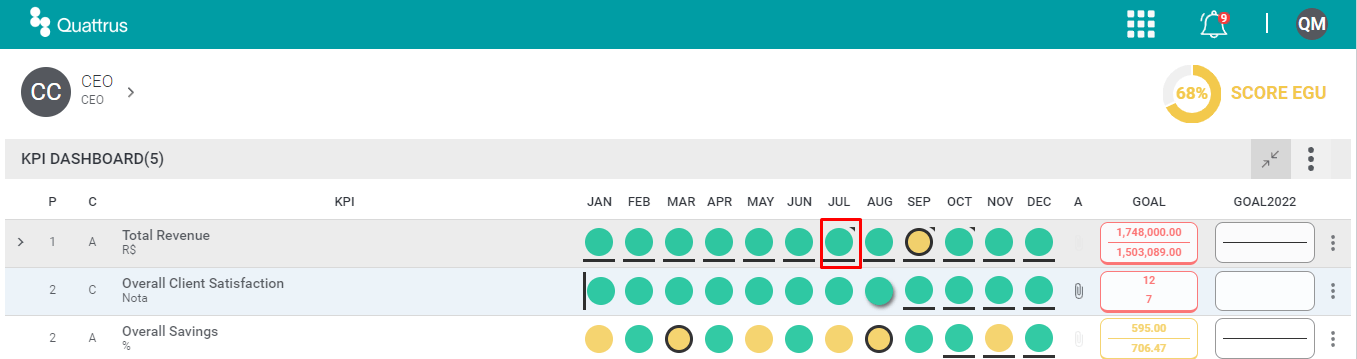
Whenever a headlight has a black border, it means that it needs analysis.
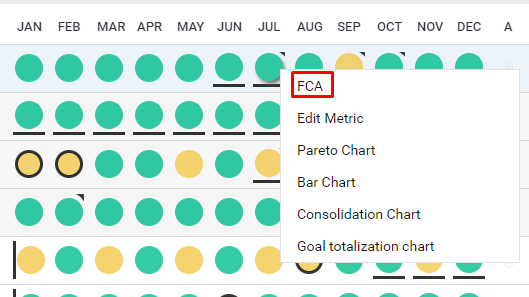
When you click on the month, the FCA feature will appear. Click on the option.
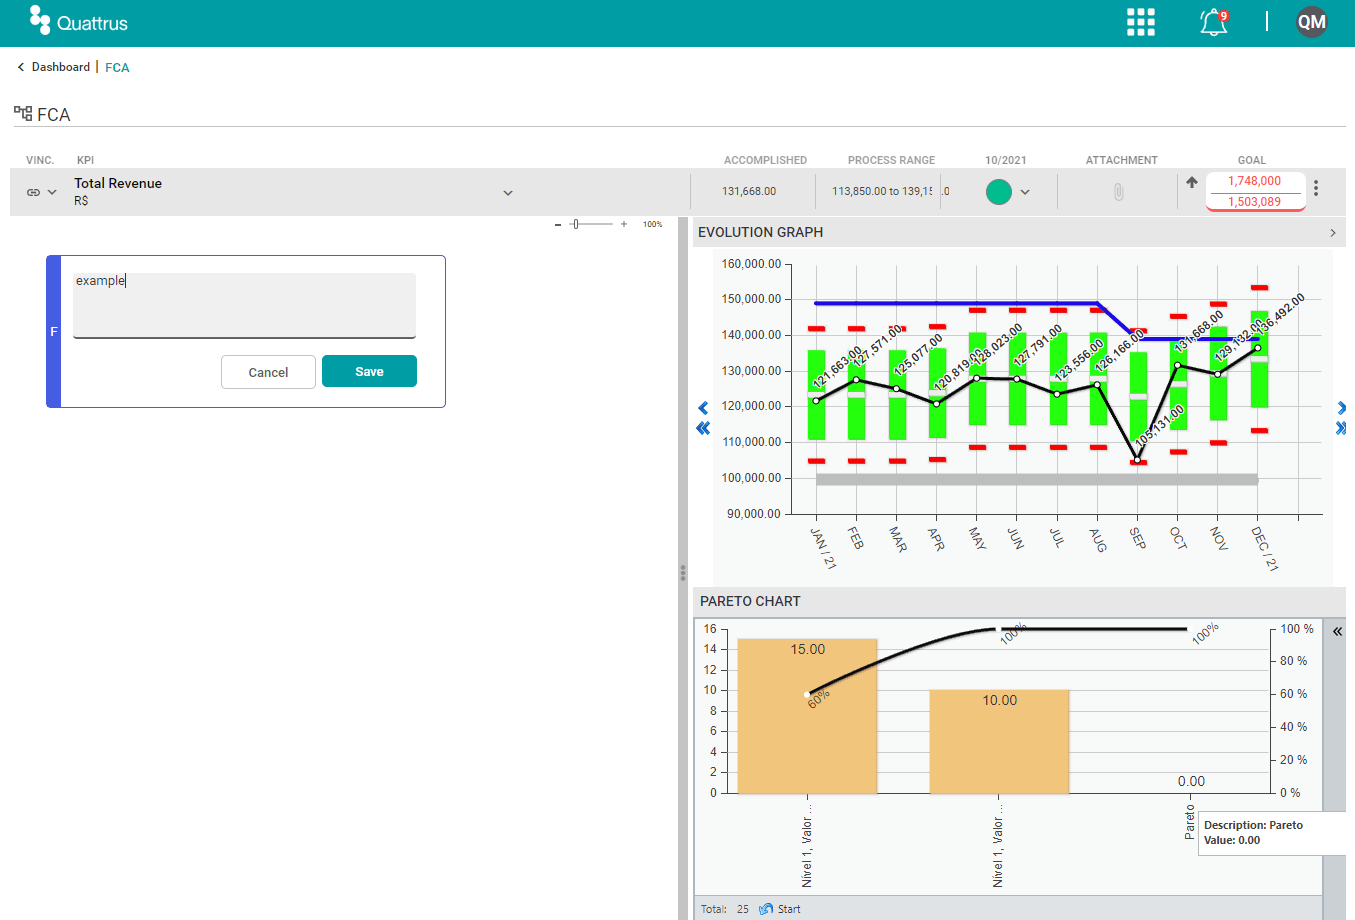
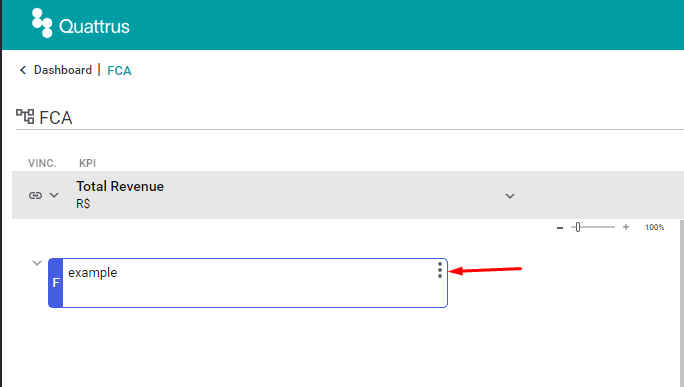
When you access the FCA screen, the window for adding the Fact will open.
You must enter the description of the Fact and then click Save.
After adding the fact click the 3-dot button to display other options.
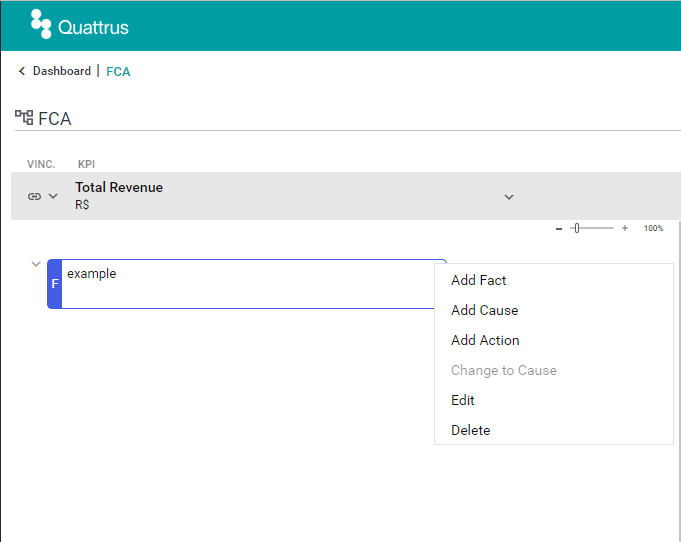
In the options menu you can:
- Add a new suit;
- Add a cause;
- Add an action;
- Change the type, for example, change a Fact to Cause.
- Edit the record;
- Delete the record.
IMPORTANT:
You should enter the complete root cause analysis, recording each cause in a separate box, thus indicating the relationship between the causes.
Actions that are not completed and actions that are overdue will be indicated in your Pending Actions. We will look at this function in the next steps.
Pareto’s principle says that if you focus on 20% of the causes, 80% of the problems tend to be solved. With the Pareto tool you can identify and sort the main causes that affected a given result.
Creating a Pareto
Select the headlight of the desired month as indicated below.
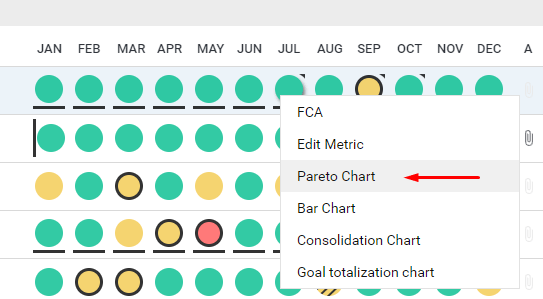
After clicking on the headlight select the Pareto Graph functionality.
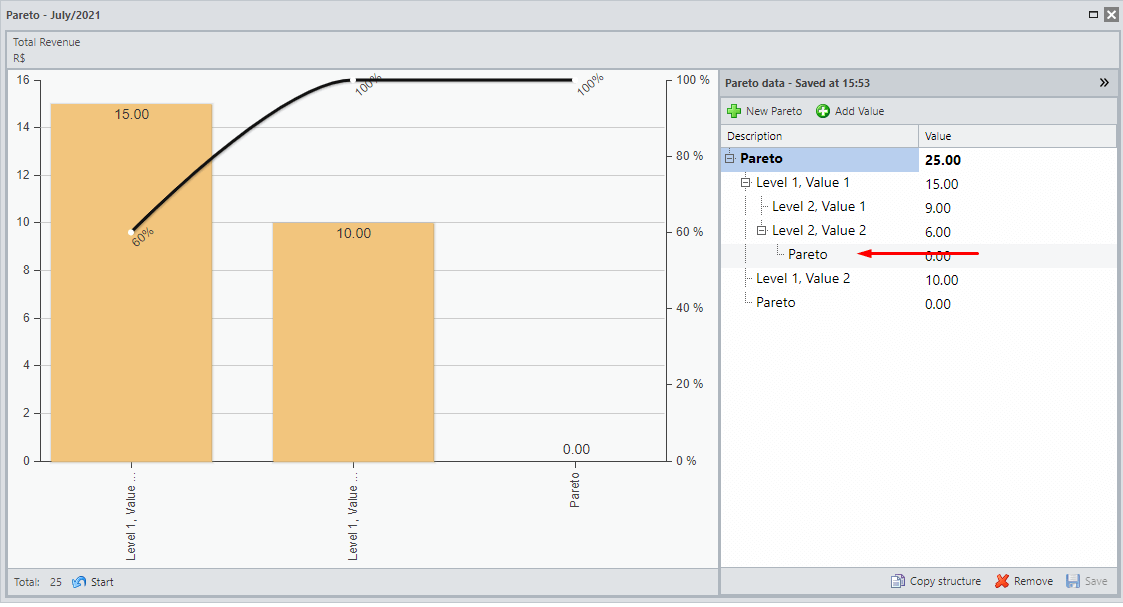
The Pareto screen will open. To register a new Pareto, click on “New Pareto“.
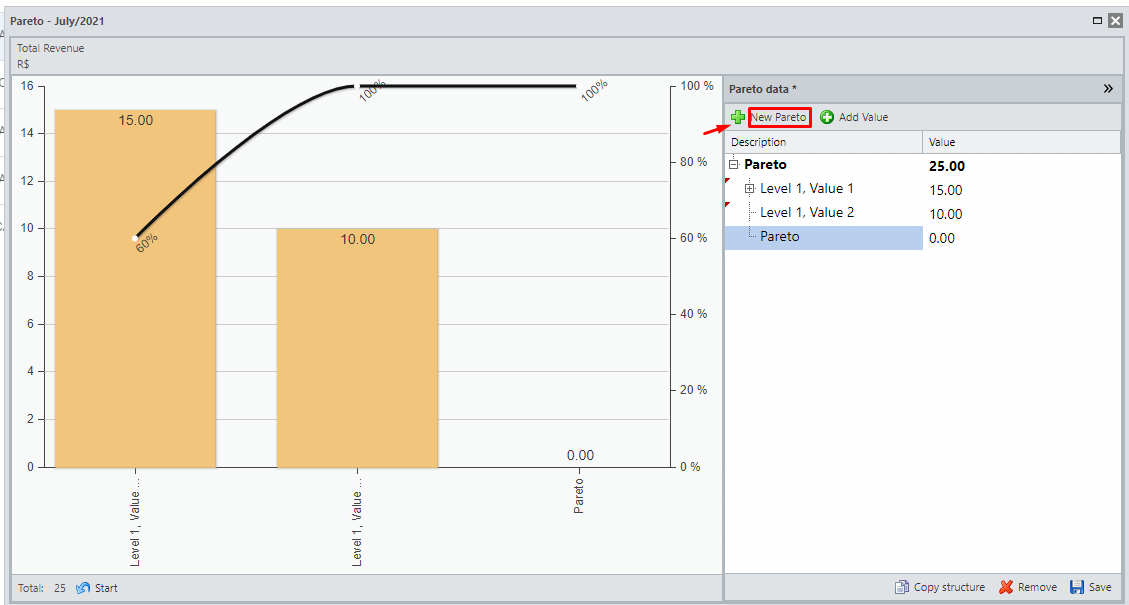
The system will include a line called Pareto which you can edit to insert another name that better represents the data that will be presented in the chart.
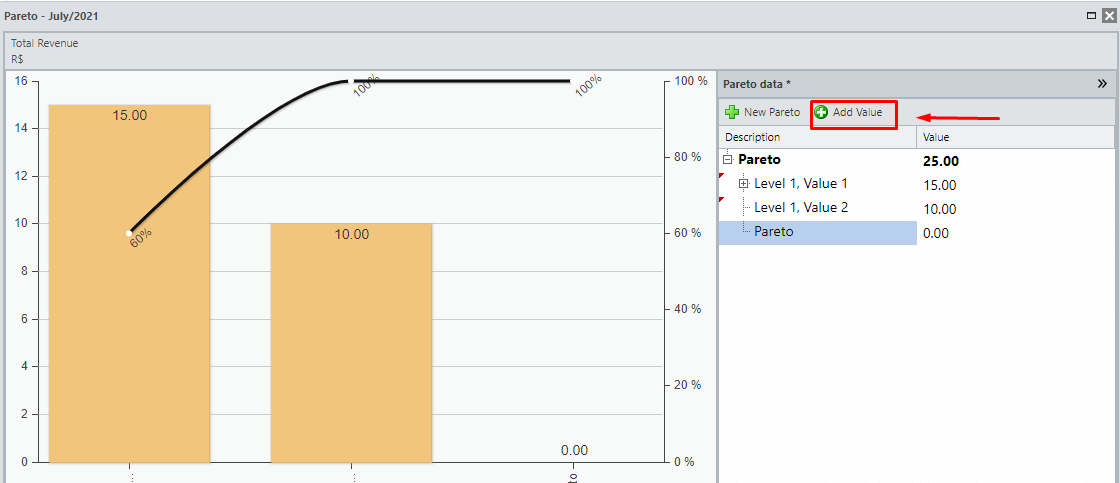
To create the data that will compose the Pareto click on Add Values. You must include as many rows as necessary.
Then click on each row to edit the names and respective values to update your Pareto chart.
NOTE:
You can add other Pareto levels to show a detailed breakdown.
To do this, select the row you want to detail and then click “Add Value” again.
In the example below, a row was added below Level 2, Value 2 by selecting it.