Related posts
[/et_pb_text][/et_pb_column][et_pb_column type=”3_5″ _builder_version=”3.25″ custom_padding=”|||” custom_padding__hover=”|||”][et_pb_post_title meta=”off” featured_image=”off” _builder_version=”3.17.6″ title_font=”|700||||on|||” title_font_size=”36px”][/et_pb_post_title][et_pb_tabs _builder_version=”4.9.2″ hover_enabled=”0″ sticky_enabled=”0″][et_pb_tab title=”FCA” _builder_version=”4.9.2″ hover_enabled=”0″ sticky_enabled=”0″]
FCA is an acronym for “Fact-Cause-Action”. This resource is used to analyze the result of the KPI in the month in which it is out of range, that is, it does not have the green color.
Creating an FCA
Whenever a beacon has a black outline, it means that it needs analysis.

NOTE:
In the months of January and February FCA have already been done, so they don’t have a black outline.
When you click on the month, the FCA tab will appear. Click on it.

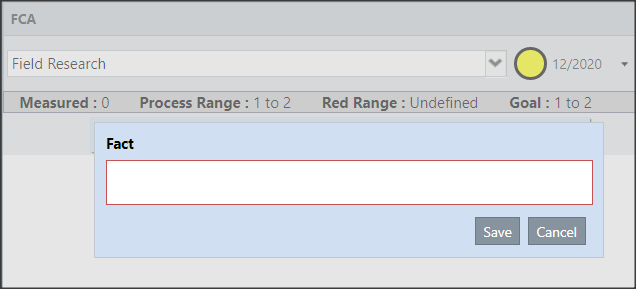
When you open the FCA tab, the window to add the Fact will open.
You can add the fact by clicking Save or perform the analysis later by clicking Cancel.
After adding the fact, three options will appear, as shown below. If you click on “F”, you can register a new fact. If you click on “C”, you will register a cause linked to the fact that has already been created, and when you click on “A”, you can create an action for the facts and causes already registered.

Note that on the right side you can see the chart and Pareto of the KPI.
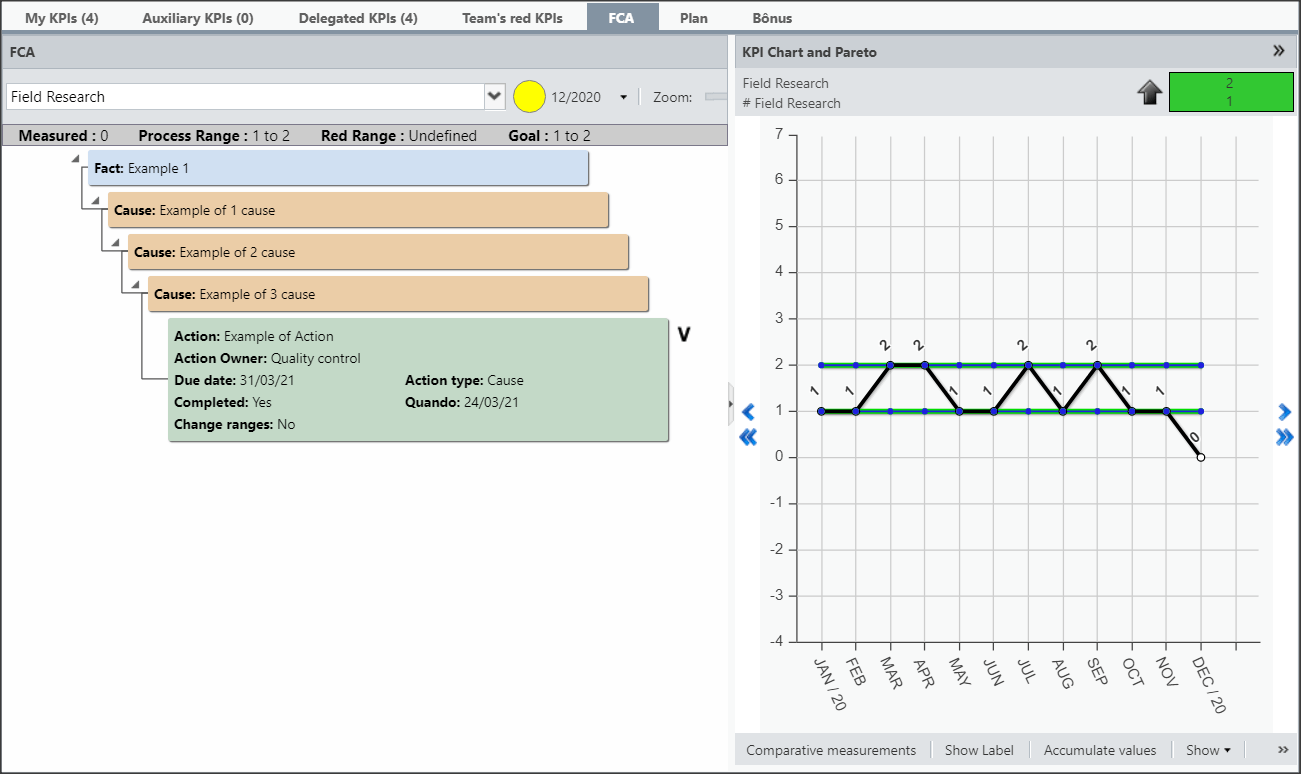
Actions that have not been completed or have expired will be indicated in your Pending Actions. We will see this function in the next steps.
For more information about the FCA, visit our other articles:
[/et_pb_tab][et_pb_tab title=”Pareto” _builder_version=”4.9.2″ hover_enabled=”0″ sticky_enabled=”0″]Pareto’s principle says that if we focus on 20% of the causes, 80% of the problems tend to be solved. With the Pareto’s tool you will be able to identify and order the main causes that affected a given result.
Creating a Pareto
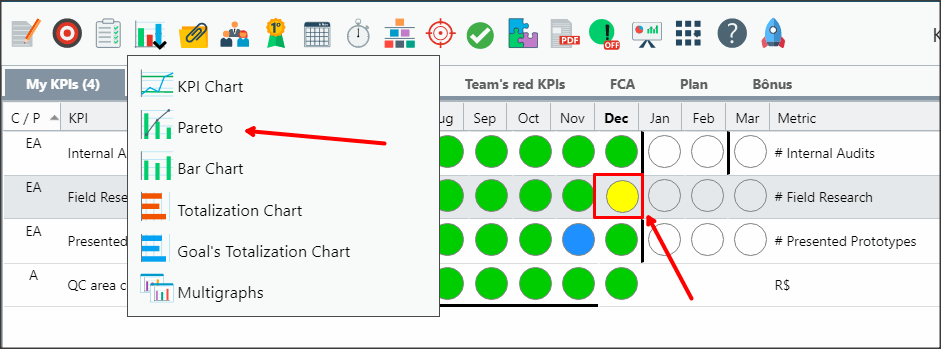
Select the beacon of the desired month and click on the charts icon. Select the Pareto option, as shown below:
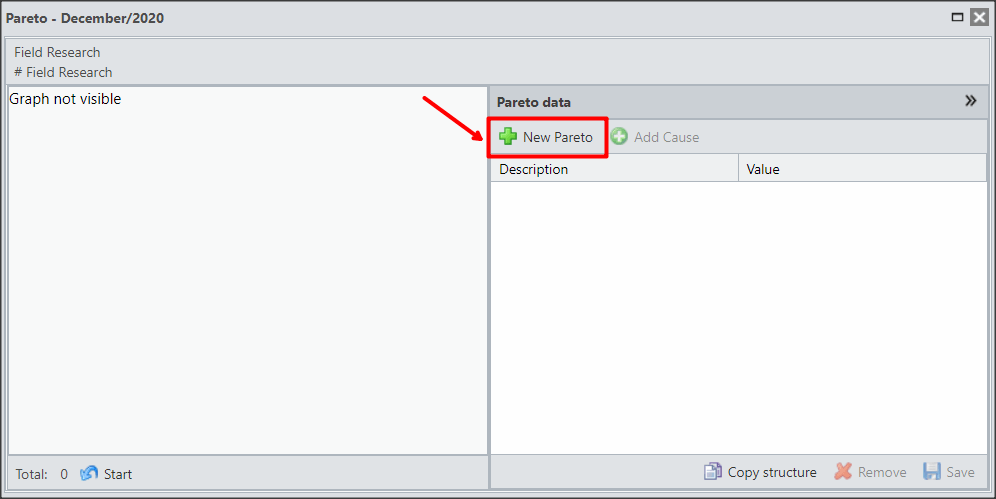
The Pareto screen will open. To register a new Pareto, click on “New Pareto”.
The Pareto line will appear.
To add a new line and build your Pareto, click on Add Values.
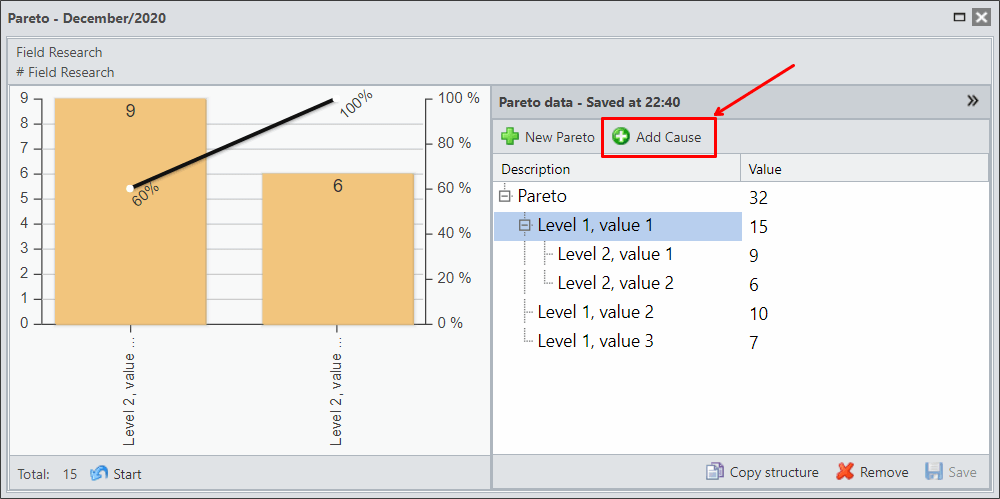
NOTE:
A line will be added below the selected line. In the example above, a line will be added below Level 2, Value 2.
For more information about Pareto, visit our other articles:
[/et_pb_tab][/et_pb_tabs][/et_pb_column][et_pb_column type=”1_5″ _builder_version=”3.25″ custom_padding=”|||” custom_padding__hover=”|||”][et_pb_image src=”https://suporte.quattrus.com/wp-content/uploads/2021/03/Artboard-2-copy-5.jpg” title_text=”Artboard 2 copy 5″ align_tablet=”center” align_phone=”” align_last_edited=”on|desktop” disabled_on=”on|on|” admin_label=”ESP – Banner – Contato Suporte” _builder_version=”4.9.2″ z_index=”0″ always_center_on_mobile=”on” saved_tabs=”all” locked=”off”][/et_pb_image][et_pb_image src=”https://suporte.quattrus.com/wp-content/uploads/2021/03/Prancheta-1.jpg” title_text=”Prancheta 1″ url=”https://www.qualitin.com.br/consultoria/” url_new_window=”on” align_tablet=”center” align_phone=”” align_last_edited=”on|desktop” disabled_on=”on|on|” admin_label=”Banner – Consultoria” _builder_version=”4.9.2″ max_width=”100%” saved_tabs=”all”][/et_pb_image][/et_pb_column][/et_pb_row][/et_pb_section]

 Português
 Español