

 Português
Related Posts
[/et_pb_text][/et_pb_column][et_pb_column type=”3_5″ _builder_version=”3.25″ custom_padding=”|||” global_colors_info=”{}” custom_padding__hover=”|||”][et_pb_post_title meta=”off” featured_image=”off” _builder_version=”3.19.18″ title_font=”|700||||on|||” title_font_size=”36px” border_width_bottom=”5″ border_color_bottom=”#0c71c3″ global_colors_info=”{}”][/et_pb_post_title][et_pb_text admin_label=”Info” _builder_version=”4.10.4″ text_font=”||on||||||” text_font_size=”12px” text_letter_spacing=”1px” text_line_height=”1.5em” custom_margin=”-40px|0px||” custom_margin_tablet=”-20px|||” custom_margin_phone=”” custom_margin_last_edited=”on|phone” custom_padding=”0px|0px||” z_index_tablet=”500″ global_colors_info=”{}” custom_margin__hover_enabled=”on” custom_margin__hover=”-40px|0px||”]
On the Administrative panel, having the necessary releases, it will be possible to schedule meetings for all Users that the administrator has access to, not only for their subordinates.
Register Results Meetings, Monitoring, Support Meetings, Training, Feedback or General Meetings.
In this article we will see:
[/et_pb_text][et_pb_text admin_label=”Tópico 1″ module_id=”topic_01″ _builder_version=”4.10.4″ text_font=”||||||||” text_letter_spacing=”1px” header_font=”|||||on|||” header_text_color=”#474747″ header_3_font=”|||||on|||” custom_margin=”30px|0px|10px|0px||true” custom_padding=”10px|||10px||false” border_color_all=”#0c71c3″ border_width_bottom=”3px” border_width_left=”3px” global_colors_info=”{}”]How to Schedule Meetings
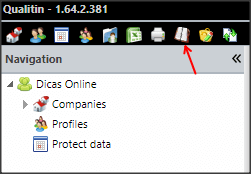
[/et_pb_text][et_pb_text _builder_version=”4.10.4″ custom_margin=”|25px|0px|25px||true” custom_padding=”||0px” global_colors_info=”{}”]Clink on the icon indicated below:
When you open the calendar view, in the left pane you will see the calendar thumbnail and meeting types.
You will see that the types of meetings have different colors, for each type of meeting the corresponding color will appear in the calendar.
Note: For meetings not held, the meeting type color on the calendar will appear in red.
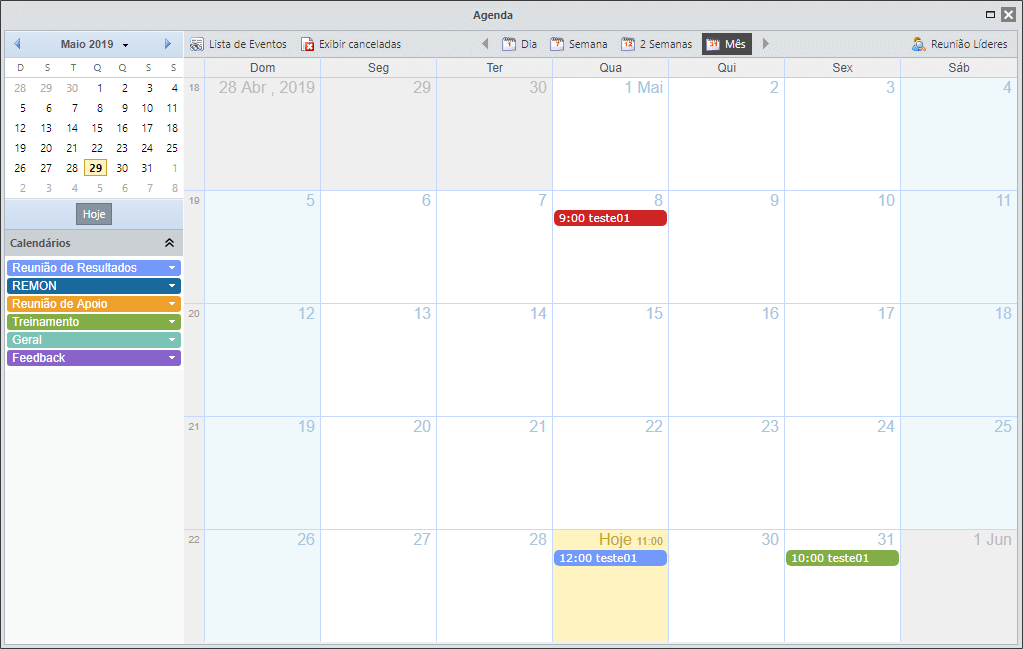
To register a new meeting, just click on the day you want, and a window will open:
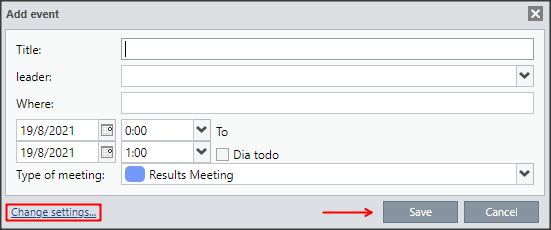
Fill in the title of the meeting, the leader, where it will be held, start and end times and then the type of meeting. Then click Save.
For further information, click on “Change Details…”. A screen with four tabs will open (Event, Pending, Participants and Minutes). Browse below to learn more about each of the tabs:
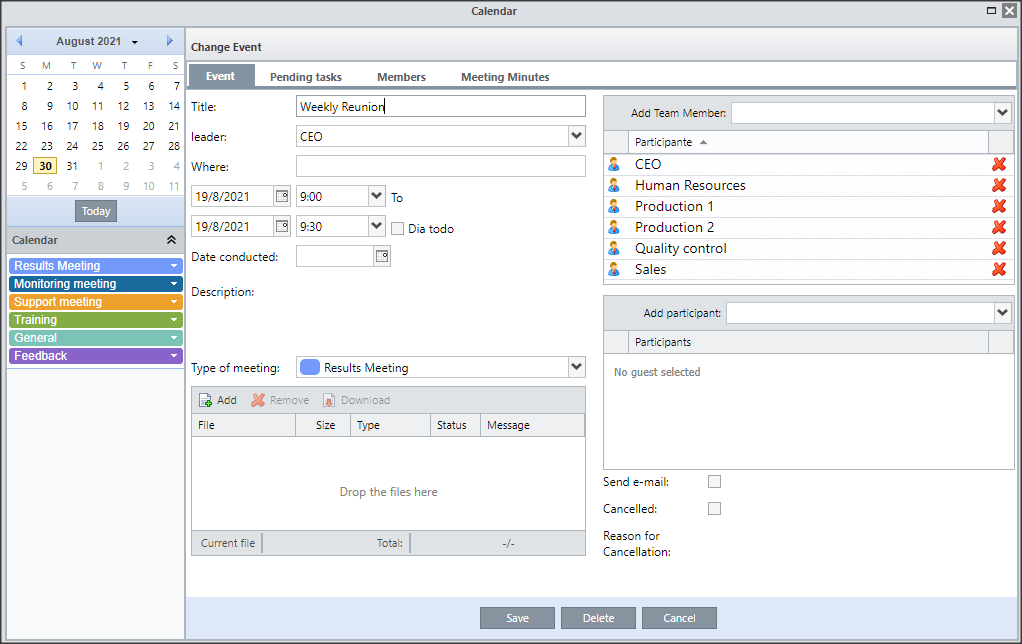
From this screen, we can change the basic information of the meeting, such as: title, leader, location and period.
After holding the meeting, enter the date in the Date Held field.
In Description, the meeting author can put a brief descriptive note of the meeting.
You can also change the Meeting Type and Attach Files, here you can attach the Minutes of the Meeting, for example.
IMPORTANT:
Attached files must be a maximum of 2MB.
Allowed extensions: .doc ; .docx; .xls; .xlsx ; .pdf or .txt .
The Add Participants field will be automatically populated with the meeting leader’s subordinates, and in this field you can change or add ICG users who are subordinate to the lead user.
For other users who are not subordinates, the Add Guest field must be used, which is found below.
Also on this screen, we can select whether an email will be sent to alert us about the meeting, and we can also Cancel the Meeting, if necessary, and enter the reason for cancellation.
[/et_pb_tab][et_pb_tab title=”Pending Tasks” _builder_version=”4.10.4″ global_colors_info=”{}”]IMPORTANT:
Sending cnovite emails requires Task Monitor enabled. If you do not have this feature enabled, consult your Administrator, Facilittor, Consultant or Qualitin Support.
By clicking on the Pending tab, you should see a screen like the one below:
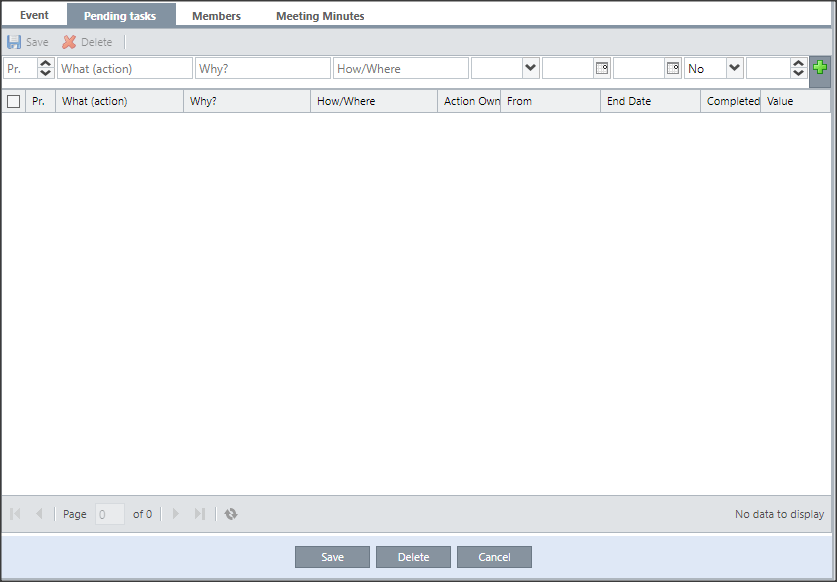
You can add the tasks that have been defined for each participant in the meeting. To do this, just fill in the data and click on the + button.

After that, the to-do should appear listed as in the image below:

Tasks that are added for users will appear in the Pending Actions list located in each user’s ICG, they can also be consulted from the tasks you registered in the Tasks icon in your dashboard menu.
[/et_pb_tab][et_pb_tab title=”Members” _builder_version=”4.10.4″ global_colors_info=”{}”]On this tab, the person responsible for the meeting can mark the users who attended the meeting, and if someone has been replaced, list who replaced them.
To mark who participated, simply check the box in the participation column. If that user has not participated, just uncheck the checkbox and write in the field beside who replaced him.
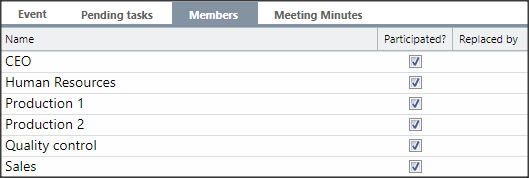
These users are displayed according to the list of participants defined in the event tab, as seen above.
[/et_pb_tab][et_pb_tab title=”Meeting Minutes” _builder_version=”4.10.4″ global_colors_info=”{}”]The minutes tab provides a rich text tool with several features, enabling the creation of the document without the need to attach any file to the ICG.
As well as the meeting leader, users with an administrator profile will also be able to write/edit the minutes. The other participants will only be able to consult it.
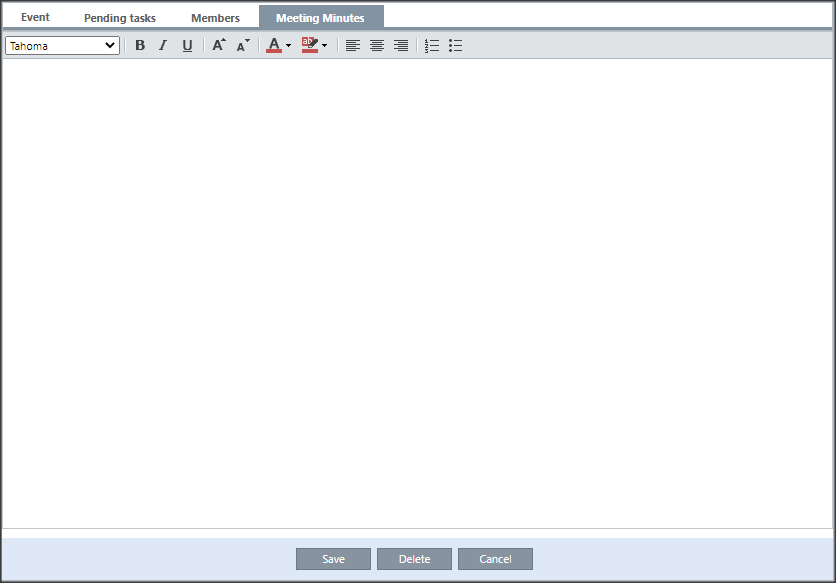
To find out how to consult the Minutes, access the article Meeting Agenda: Consulting the Minutes.
[/et_pb_tab][/et_pb_tabs][et_pb_text _builder_version=”4.10.4″ custom_margin=”-30px|25px||25px||true” custom_margin_tablet=”-15px||” custom_margin_phone=”” custom_margin_last_edited=”on|tablet” global_colors_info=”{}”]Don’t forget to save when done.
[/et_pb_text][et_pb_text admin_label=”Borda Inferior” _builder_version=”3.27.4″ custom_margin=”-50px||40px|” custom_margin_tablet=”-30px||” custom_margin_phone=”” custom_margin_last_edited=”on|tablet” custom_padding=”|25px||25px” box_shadow_style=”preset3″ global_colors_info=”{}”]TESTE[/et_pb_text][et_pb_text admin_label=”Tópico 2″ module_id=”topic_02″ _builder_version=”4.10.4″ text_font=”||||||||” text_letter_spacing=”1px” header_font=”|||||on|||” header_text_color=”#474747″ header_3_font=”|||||on|||” custom_margin=”30px|0px|10px|0px||true” custom_padding=”10px|||10px||false” border_color_all=”#0c71c3″ border_width_bottom=”3px” border_width_left=”3px” global_colors_info=”{}”]
Overview
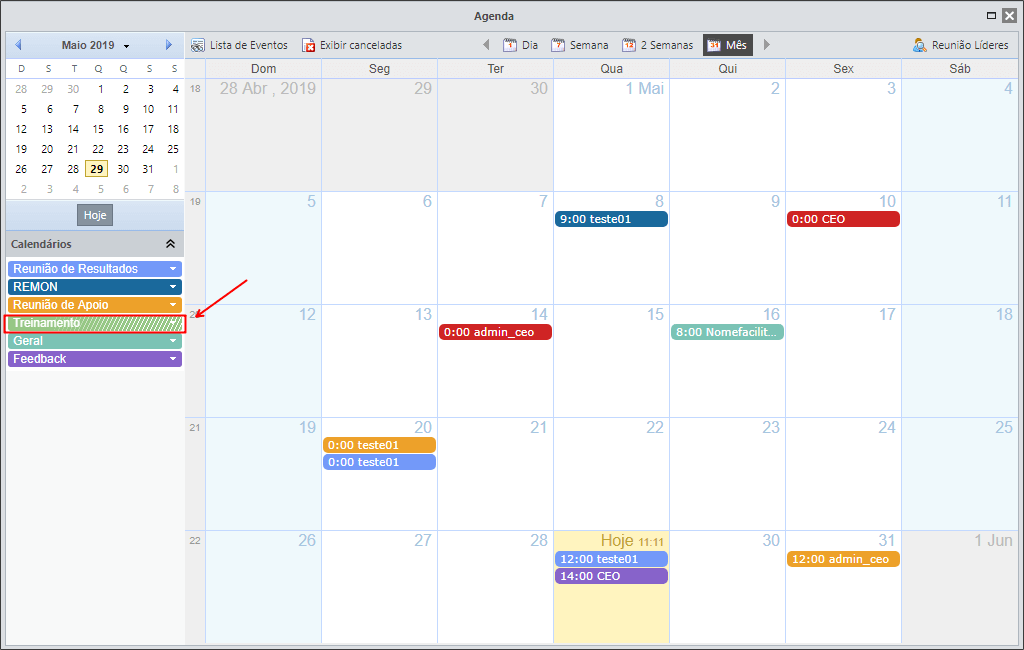
[/et_pb_text][et_pb_text _builder_version=”4.10.4″ custom_margin=”|25px|0px|25px||true” custom_padding=”||0px” global_colors_info=”{}”]After registering the events in your calendar, you will be able to see everything that was created in the calendar, also visualizing that each type of meeting is being painted by its corresponding color. as below:
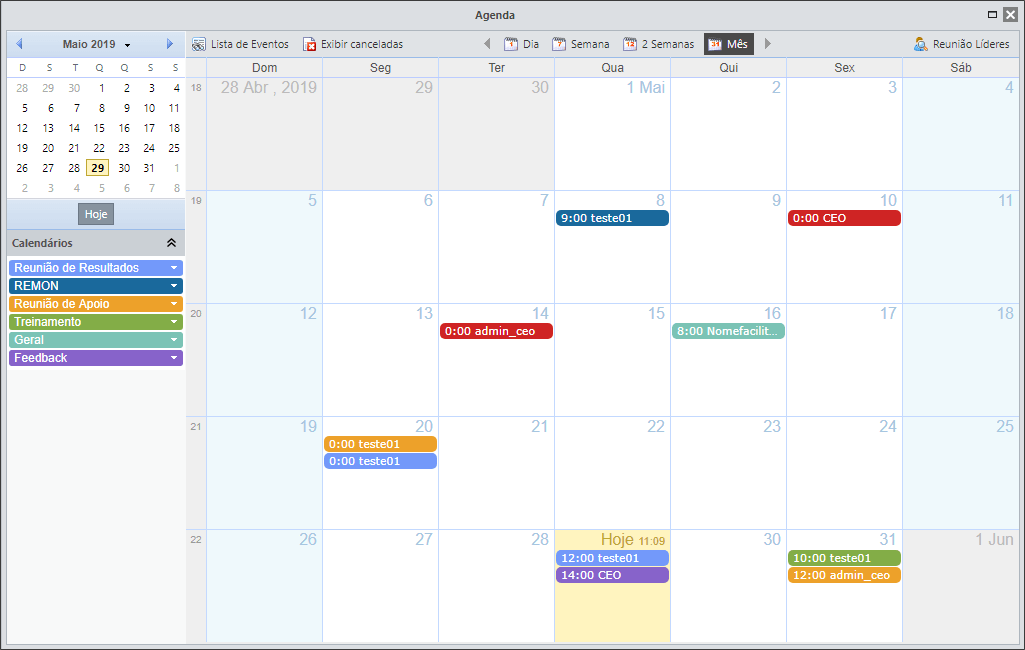
You can filter what will be shown from the menu on the left of the calendar, selecting what will and will not be shown.
Note that in the image below the trainings are not being displayed on the calendar.
[/et_pb_text][et_pb_text admin_label=”Borda Inferior” _builder_version=”3.27.4″ custom_margin=”10px||40px|” custom_padding=”|25px||25px” box_shadow_style=”preset3″ global_colors_info=”{}”]TESTE
[/et_pb_text][et_pb_text admin_label=”Tópico 3″ module_id=”topic_03″ _builder_version=”3.27.4″ text_font=”||||||||” text_letter_spacing=”1px” header_font=”|||||on|||” header_text_color=”#474747″ header_3_font=”|||||on|||” custom_margin=”30px|0px|10px|0px||true” custom_padding=”10px|||10px||false” border_color_all=”#0c71c3″ border_width_bottom=”3px” border_width_left=”3px” global_colors_info=”{}”]
Menu
[/et_pb_text][et_pb_text _builder_version=”4.10.4″ custom_margin=”|25px||25px||true” custom_padding=”||0px” global_colors_info=”{}”]In the top menu, there are some options:
![]()
It will be possible to search the registered meetings. Fill in the filters you need and click Search.
You can also export meetings or display only searched meetings in the calendar.

If this button is turned on, the meetings that were canceled will appear:
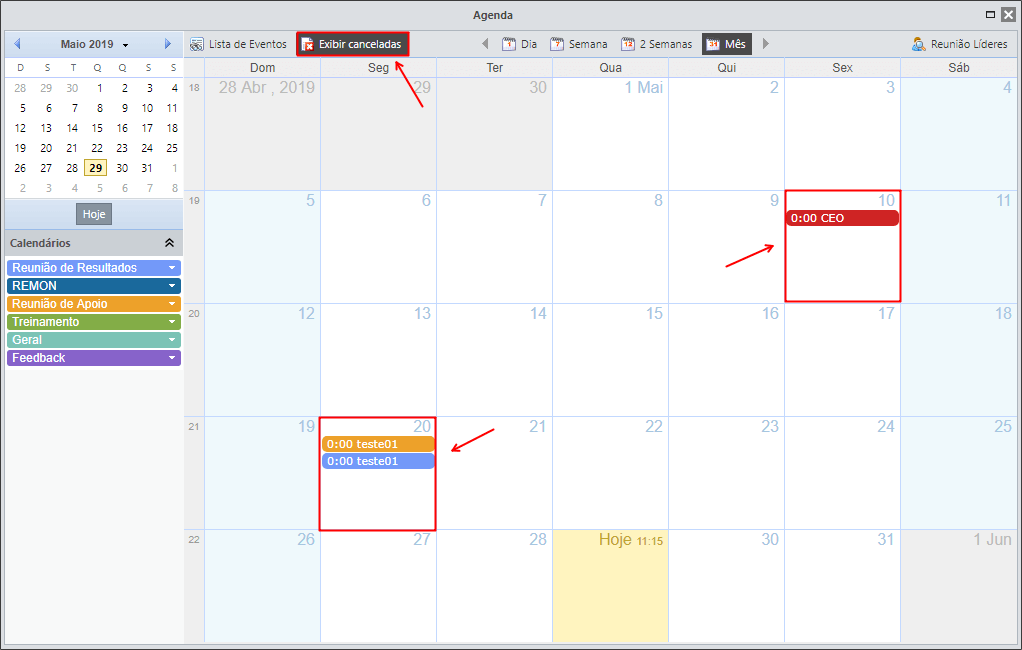
By disabling this button, canceled meetings will not be displayed.

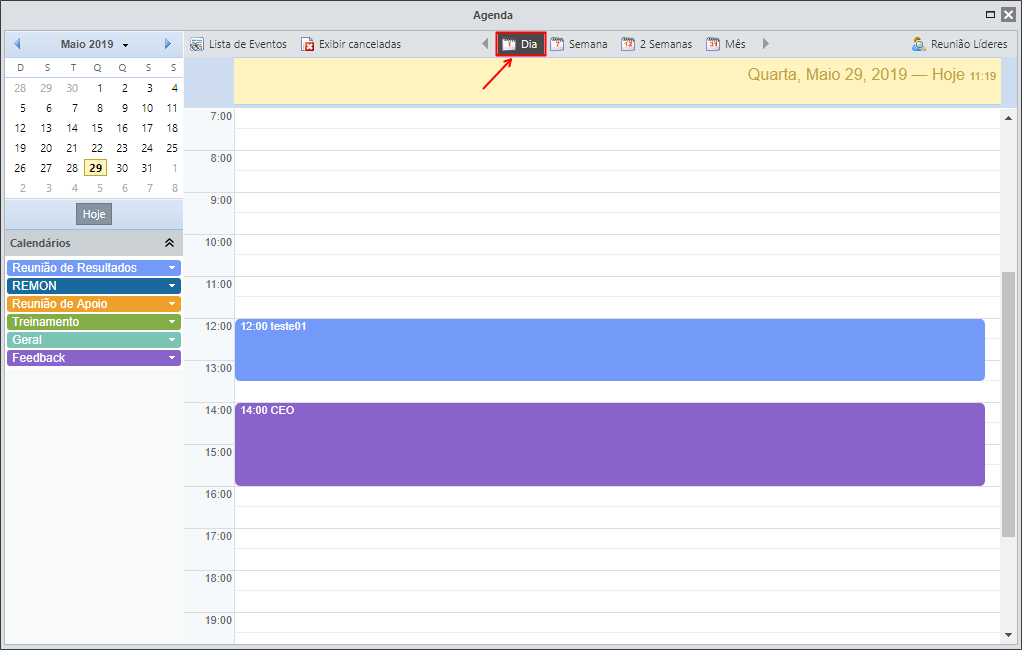
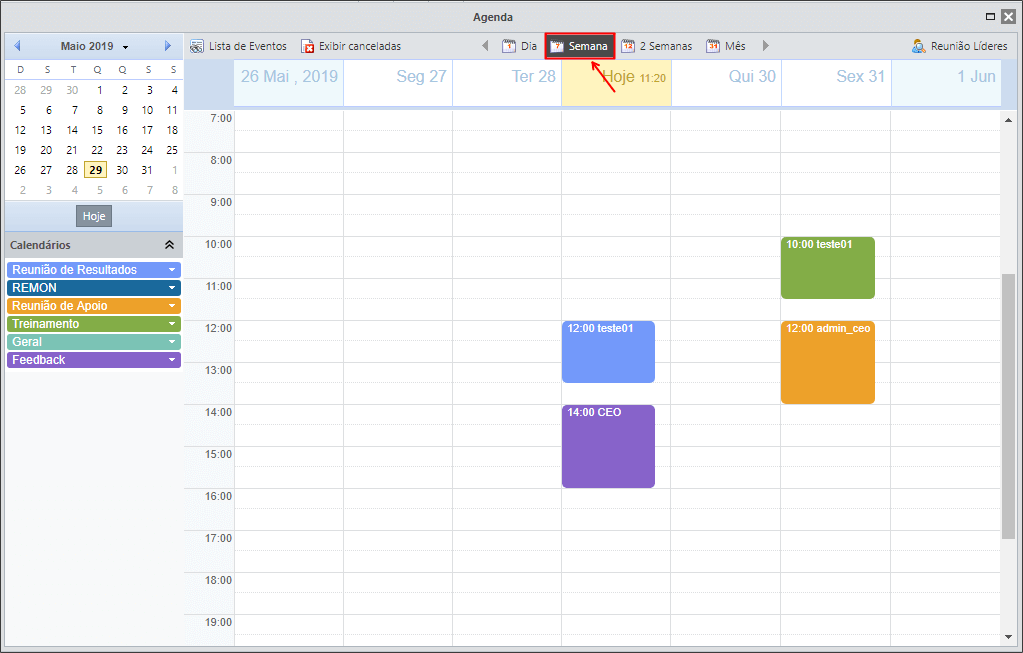
By default, the calendar will open with the monthly view, but you can choose to view only one day, one week, or two weeks.
- Day
- Week
- Two Weeks

Here, the monthly meetings of each Lead User in the Meeting will be displayed.
You will be able to see which users have not applied any meetings in the month.

[/et_pb_text][/et_pb_column][et_pb_column type=”1_5″ _builder_version=”3.25″ custom_padding=”|||” global_colors_info=”{}” custom_padding__hover=”|||”][et_pb_image src=”https://suporte.quattrus.com/wp-content/uploads/2022/04/FICOU-COM-DUVIDAS-ING2533.png” title_text=”FICOU COM DÚVIDAS ING%912533%93″ align_tablet=”center” align_phone=”” align_last_edited=”on|desktop” disabled_on=”on|on|” admin_label=”ESP – Banner – Contato Suporte” _builder_version=”4.14.8″ z_index=”0″ hover_enabled=”0″ always_center_on_mobile=”on” saved_tabs=”all” locked=”off” global_colors_info=”{}” sticky_enabled=”0″][/et_pb_image][/et_pb_column][/et_pb_row][/et_pb_section]